The Reports Menu can be accessed by clicking the Reports icon on the Action Bar:
 OR
OR 
OR
Click the icon menu option on the left or the breadcrumb link on the right for the Full menu.
 OR
OR 
This will display the Full menu in a tabular form, with four sections, Registration, Status, Cashier and Other.
 OR
OR 
From the Status Section, select Reports.
 OR
OR 
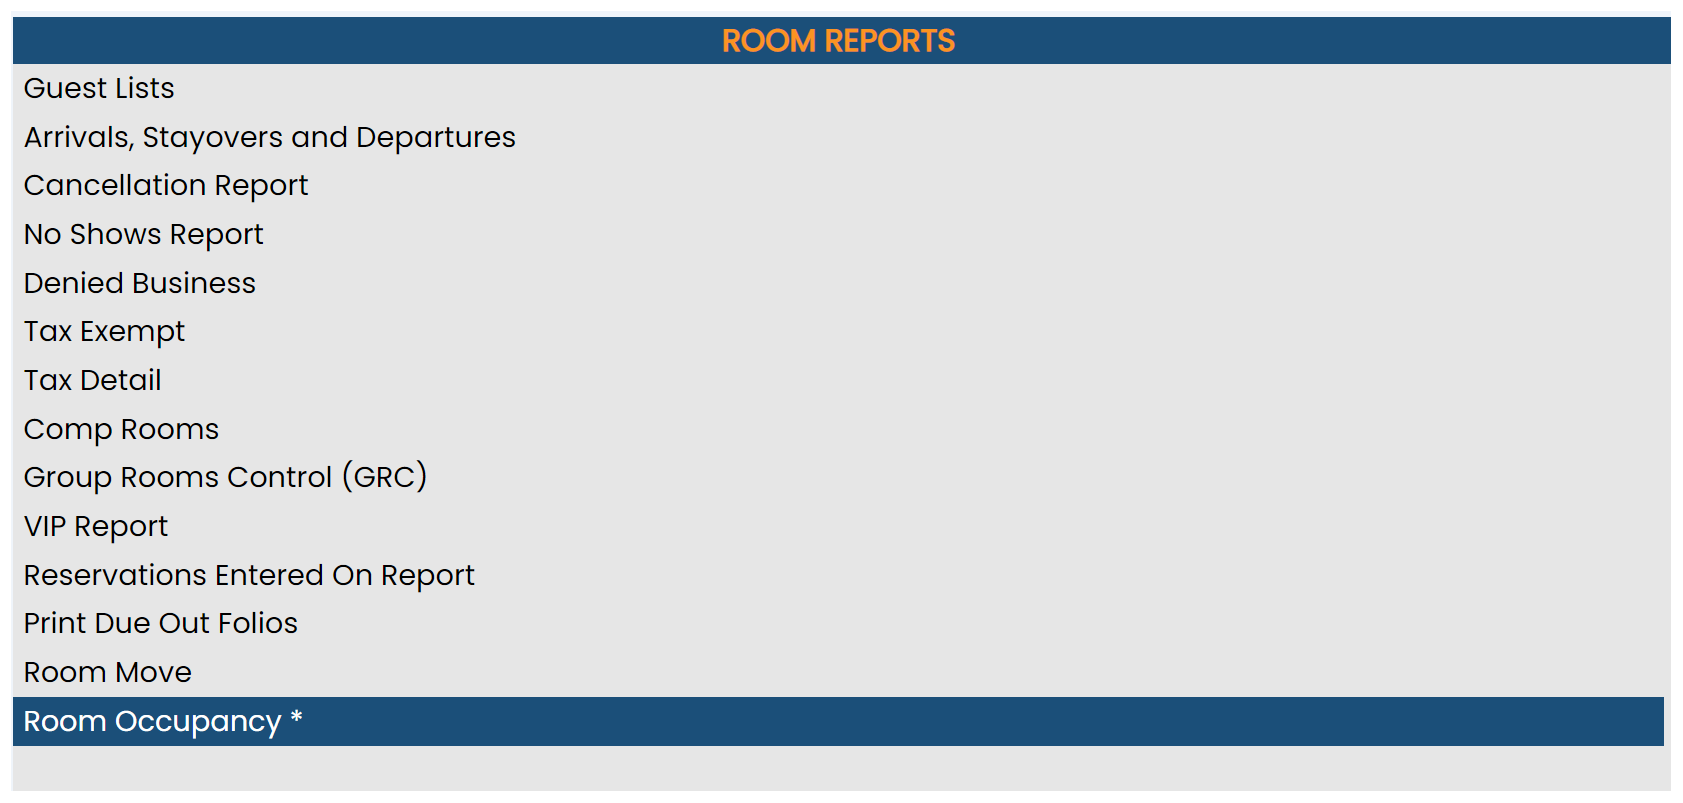
The Reports Menu screen is divided into four sections, each containing command links for different types of reports. These sections are Room Reports, Revenue Reports, Managers Reports and Other Reports.
 OR
OR 
The Room Occupancy report command is in the Room Reports section.
 OR
OR 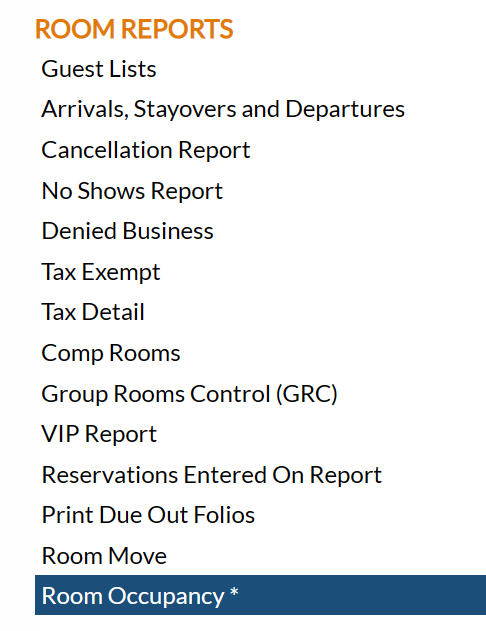
When the Room Occupancy command is selected, the Room Occupancy Report screen will open.

Show All Hotels: This box may be checked or unchecked. By default it is unchecked, meaning the generated report will show information ONLY for the current Property. For this report, you may choose to show the information from ALL your Properties within Skyware on one report, rather than generating separate reports for each Property.
Report Date: You will need to specify the Date Range for the Report.
From: Click anywhere in the field to open the calendar and select the Date you wish to have the Reporting begin for the report. By default the Date selected is the first day of the current month.
To: Click anywhere in the field to open the calendar and select the Date you wish to have the Reporting end for the report. By default the Date selected is the last day of the current month.
Report Options: Choose the options you want to view in this report.
Building: This is a drop-down menu of available building options. By default the option -ALL- is selected. Select one or leave as -ALL-. This allows you to narrow the report focus to one particular building, if desired.
Rate Plan: This is a drop-down menu of available rate plan options. By default the option -ALL- is selected. Select one or leave as -ALL-. This allows you to narrow the report focus to one particular rate type, if desired.
Include Non-Bedded Rooms?: This box may be checked or unchecked. By default it is unchecked. If checked, the report will also show the occupancy of any non-bedded rooms at your Property.
Suppress Rooms Unavailable for this Date Range?: This box may be checked or unchecked. By default it is CHECKED.
Room Types shown: Choose ONE option using the radial buttons. You may select All, or specify the room types seen in the report.
All Rooms: By default All is selected.
Select Individual Room Types: If you select this option, a separate list of all room types will appear to the right. You may then select one or more of the room type classifications that will appear within the list box.
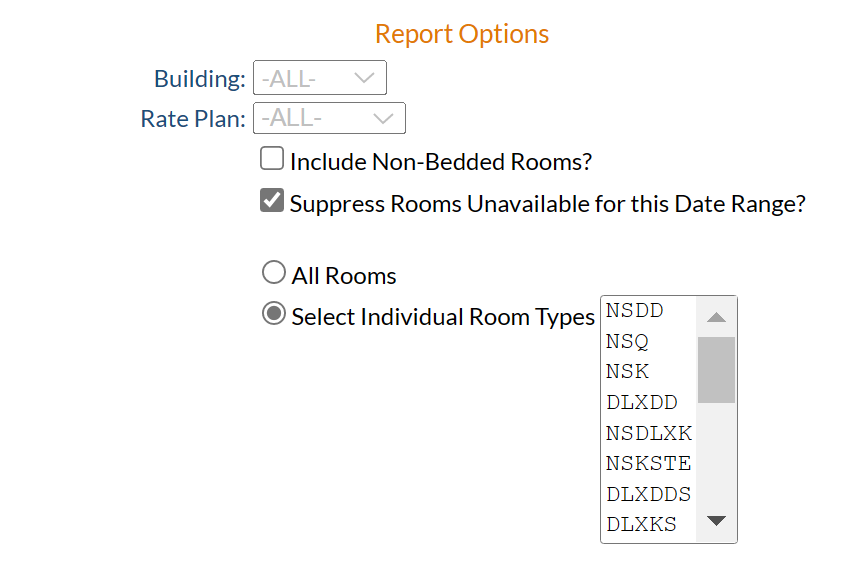
To select, click on the desired option for one selection, or hold down the CTRL key while selecting each to make multiple selections from the list.
Sort Options: Choose which (ONE) Sort Option you want for this report.
The default option is Rack Order. You may choose to show the information by:
Rack Order: Shows the information organized by rack order. (This is NOT necessarily numerical order).
Room Number: Shows the information organized numerically by room number assigned to the room.
When finished, click the orange button Show Report.

When generated, the report shows the date range selected at the top (with the room type(s) selected, if not All), and lists in separate columns the room type and room number, the number of days occupied, days OOO and days vacant, A.D.R. (average daily rate) and the Rev PAR, as well as the numbers of guests (A/Y/C/p), with a final column being total number of days in the date range selected, for all selected rooms. A totals line at the bottom of the report shows the totals for the individual columns, over the selected date range.
By default, the report is generated in PDF form and opens in a separate browser window. From there you can select to save or print the report, among other options. You can, instead, check the Generate report to excel checkbox to generate the report in HTML for downloading to Excel instead of PDF, or use the checkbox Generate report to Excel (data only) to generate the data only for importing into another document rather than immediate viewing.
NOTE: The generated report appears as a pop-up window through your browser. If your browser is set to block pop-ups, you may receive a warning banner at the top of the browser. Click this banner and select to allow pop-ups so that you can view the report.